Contents
What is one thing that determines whether you’re going to survive when the world is coming to an end? Food.
In fact, according to some theories, world civilizations will go to war against each other in the future over basic resources like food and water.
For a prepper, whether he is an amateur or an expert, it is of crucial importance to know how to cook food in different trying situations. Things are not always going to be the same; sometimes you’re going to be on the road, and sometimes you’ll be trying to survive in a forest or a desert. The best way to ensure your safety and of your loved ones is to be completely skilled and knowledgeable in how to cook food in various situations.
In this article, I will try to bring all the best DIY cooking methods that every survivalist must have in his arsenal to keep himself and his family alive and well.
As a bonus, I have also added some of the best cooking appliances that are well suited for survival situations, along with their pros and cons.
DIY Survival Cooking Methods
Campfire
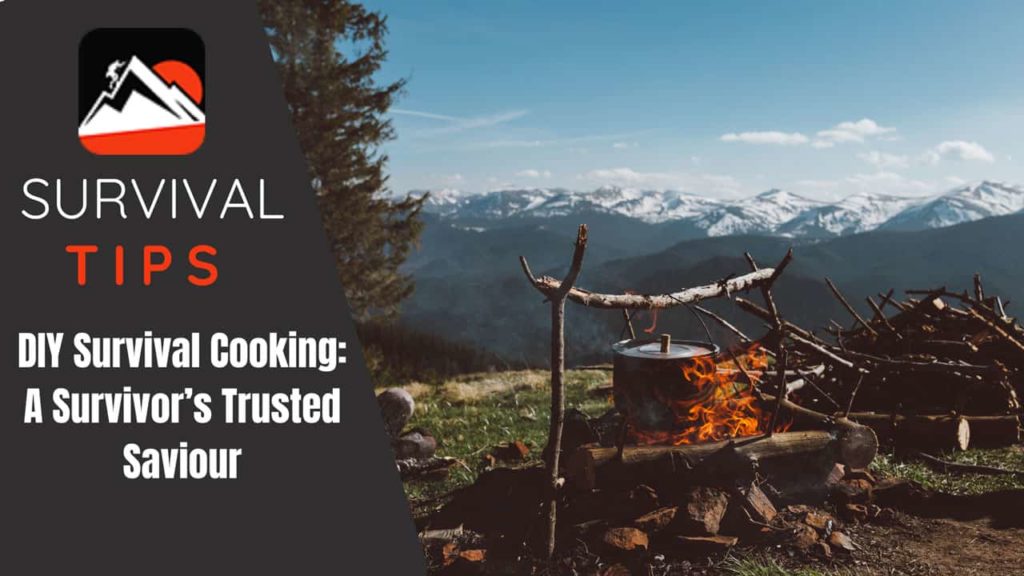
The first method is the old reliable: Cooking on a campfire.
The real trick here is to get the fire started. You need some firewood, some firestarter, and some kindling, and you’re all set.
If you don’t happen to have firewood already with you, make sure you find pieces of wood that are dry from your surroundings. Place smaller pieces first, along with the kindling, and start the fire using the fire starter. Once it starts raging, place bigger pieces of wood while leaving some space for airflow. Once you get the fire going, it is best to let it reduce to burning coals for consistent heat for cooking purposes.
| Pros | Cons |
| Reliable TechniqueEasy to get started Requires minimal resources Can be used for multiple types of cooking | Tricky if dry wood is unavailable Hard, or sometimes impossible to do, in windy or rainy seasons |
The best thing about a campfire is that you can get creative and start cooking in many different ways with it.
You might also find interesting our article about how long bic lighters last.
1. Improvising a Grill or a Griddle
Things don’t have to be grim even in an SHTF situation.
Remind yourself of the good old BBQ days using a makeshift grill or a griddle for cooking your favorite food. All you have to do is to find the right stuff.
For grilling, a piece of chicken wire or chain link grill will do just fine. While for a griddle, you can go with a big flat piece of stone, tile, or metal sheet. All of these are pretty easy to find out there.
2. Using a Spit
Feel like a real survivalist by using a spit for cooking.
All you have to do is to place two y shaped pieces of wood on each end of the fire while using another thinner piece of wood sharpened at the end for spinning and cooking.
3. Using a Skewer
Skewers come in handy when you have fine-cut meat in cube shapes or any ship that can be easily placed on a skewer. This is especially fun if you are a family as you keep cooking and eating warm food simultaneously.
Underground BBQ Pit and Earth Ovens
These two methods are slightly different but serve pretty much the same function.
For both of these, dig a hole big and wide enough that can fit the kind of food you intend to cook. Fill the base with a thick layer of firewood and burn it until it turns to coals. Place some sort of insulation like bricks or metal sheets to protect food from directly touching the heat source. This is where these two techniques become different.
A BBQ pit is simply covered with a lid once the food is in. But in an earth oven, the food is first covered with some sort of insulation and then filled with dirt up to the brim of the hole.
These methods are great for family fun and cooking whole foods like pigs, lambs, goats, and turkeys.
| Pros | Cons |
| Easy to construct Perfect for making crispy crusts Can be used to bake meats, breads, and cook veggies | Used for foods that take longer to cook (6-12 hours) Time-consuming construction |
We also recommend reading our article about preparing for a power outage.
Dakota Fire Hole
It happens to be one of the most genius and efficient cooking methods when you’re in a survival situation.
And It functions by using holes in the ground and a tunnel between them.
All you have to do is to dig two adjacent holes in the ground at a slight distance from one another. Next up, dig a tunnel between the two holes. Fill one hole with firewood and kindling while the other hole will be used to suck oxygen through the tunnel. This is what makes it genius, as this design keeps the fire burning for longer while conserving fuel.
| Pros | Cons |
| Requires comparatively less fuel to burn Concentrated heat because of design Great protection against windLess smoke than other techniques | Can’t be done in rocky terrains or with lots of roots underground Can’t be done if its raining Not ideal for warmth |
DIY Solar Oven
A DIY solar oven is a hungry survivalist’s best friend if lighting up a fire is not an option for one reason or another.
It is a bit tricky to build but has its uses.
The reason for it being on this list is that it requires no fuel, and as you guessed from the name, uses sunlight to cook your food. The design and method are quite primitive, which makes it easier to make but also slow.
It makes use of everyday items like a cardboard box and foil, and it can be made using other similar items as well. In simple terms, the pot is placed in a box covered in foil; the foil helps reflect and converge the sunlight on the pot and cook it slowly. Here’s a detailed video on how to make a cheap and easy solar oven for yourself.
| Pros | Cons |
| Easy to make Easy to carry Doesn’t cost a lot | Slow cooking Can be easily damaged |
Stone Oven
This cooking technique is perfect for windy areas or places you can’t dig.
It is simplistic, manageable, and easy to make. Mark an area equal to where you can cook your food or place pots. The stones are then stacked in 3 walls perpendicular to each other while leaving the fourth side open. You can use wet clay for added adhesiveness and strength. Start stacking stones on top of each other. It is helpful if stones have a flat shape. Stack them as high as you want your oven to be, depending on how much fuel you’re going to use. Once these stone walls reach your desired height, you can light it up by placing and burning firewood through the opening you left earlier.
You can use a grill, griddle, pans, pots, or whatever you like over this kind of oven.
| Pros | Cons |
| Easy to make Effective in windy areas Minimal effort | Stones can topple if not stacked properly Not great for providing warmth |
Dehydrating Food
Not exactly a cooking method but a great way to preserve food for longer periods. It is easy, and probably even kids can do it.
All you have to do is to place your food, such as meats and fruits, close to a heat source so that moisture dries up gradually. The best way is to use natural sunlight and leave your food in it for a long time until it completely dries.
You can also use your campfire to slowly bake your food over it until it completely runs out of moisture.
| Pros | Cons |
| Easiest of all Can preserve food for long periods of time Minimal resources required Can be done anywhere with moderate sunlight | Dehydrated food loses its flavor Dehydrated food loses some of its nutritional value over time |
Rocket Stove
Hold on to your empty food cans because with this technique, you can convert them into a full-fledged stove.
Although it is a bit complicated to make, it is one of the most functional stoves a prepper can make on his own.
What you need are three cans, and in my opinion, food cans are the best choice for this purpose. Two cans should be smaller and of the same size than the bigger can.
For brevity’s sake, I’m going to link a video that demonstrates in detail how to make a rocket stove on your own. The process is kind of technical but nothing you can’t do if you follow the instructions carefully.
| Pros | Cons |
| Portable Sturdy Can be made using few everyday use items Can be reused again and again | Size limitations Slightly complicated to make |
DIY Hay Box Cooking
This is the best way to save some firewood for bad days in your survival journey.
It starts with cooking on your traditional campfire or any method of cooking on fuel that you prefer. But once it is heated up well enough and the cooking process has taken off, you can use the hay box cooking method to take it off the direct heat and let it cook at its own temperature.
It works by providing insulation around the high-temperature pot as it keeps cooking in its own heat. All you have to do is take a wooden box, fill it halfway up with hay, place your half-cooked meal pot in it, cover it to the brim with more hay, and cover the top. Leave it for a while as the food uses its heat to cook itself, and you have a warm, delicious meal on your hands.
| Pros | Cons |
| Helps conserve fuel such as firewood and kindling Easy to make with fewer prerequisites Portable | Not great for cold or rainy climates |
DIY Tea Light Oven
If you’re reading this, chances are you’re a prepper. And if you are a prepper, you probably have tea lights or candles in your arsenal for unexpected power outages.
Guess what? You can use these tea lights for a makeshift oven/stove if cooking gets tough(yes, I just made that expression up). It’s not technically an oven but kind of a stove. It’s pretty simple to make and easy to use.
More often than not, you have to choose one kind of pot, pan, or cooking utensil you’re going to use to make a tea light oven because you will have to make a frame around the utensil. You can create a frame using planks or sheets of wood that fits your utensil of choice perfectly. There should be a hole around the base of the utensil in the frame. Once you have the frame, all you have to do is put the frame over the tealights, put your cooking utensil inside it, light the tealights up, and you’re good to go. You can remove or add tealights as a way to control temperature.
Moreover, you don’t necessarily need a frame, but it’s better if you have it. Alternatively, you can place your utensil on well-stacked stones, cans, or anything that can hold your utensil up at a height.
| Pros | Cons |
| Easy to makeBetter temperature control Portable | Not suitable for windy or rainy climates Can’t work without tealights |
DIY Barrel Stove
Have a spare steel barrel lying around? You don’t have to worry about how to cook anymore.
You can convert a traditional barrel into a great and fully functional stove/grill just by making some tweaks. The whole process requires the use of some tools and a bit of perfection.
But once done, you’ll have on your hands a reliable cooking solution that can definitely stand the test of time. Here’s a video on how to make your own barrel stove.
| Pros | Cons |
| Sturdy Reliable Can last for a long time | Immovable Requires some tools and complicated to make |
DIY Wonder Oven
A wonder oven works on the same principle as a hay box oven, i.e., conserving heat and letting the food cook itself.
But it is at the end of our DIY cooking techniques list because making it is typically a complicated and long process that involves many steps. It is still worth mentioning because a good prepper should know all there is to know about cooking in difficult situations. After all, circumstances are not always the same.
Since the whole process of making it is quite complex, I’ll just link the video here, and we’ll move on to the pros and cons of this technique.
What I like about it is how reusable and portable it is, and it’s way less messy than a hay box oven.
| Pros | Cons |
| Portable Reusable Doesn’t require constant attention | Complicated to make Requires many tools and ingredients to make |
Cooking Devices and Appliances
You might not always have the means and resources to make your cooking solutions. This is why as a prepper, you must know about some of the most useful and functional cooking devices and appliances that will help you and your loved ones stay full.
Wood Burning Stoves & Wood Burning Grills
A wood-burning stove is a cooking device that looks like a mix between an oven and a fireplace.
- 68,000 BTUs heats up to 1,200 Sq. Ft.
It is a square-shaped apparatus that opens at the front to a roomy space. Here you can place logs and firewood to burn. On the top is a metallic surface that you can use to cook food directly or place pans and pots over it.
As for the wood-burning grill, it works the same as the stove, except for having a grill on top instead of a flat surface. They come in a variety of shapes and sizes.
Moreover, you should use both options only outdoors as using them indoors can create smoke, coughing, and watery eyes(not the best way to enjoy your food!)
They both are quite bulky in size, but if you have the luxury of space, these two can be some of the easiest cooking solutions you can go with.
| Pros | Cons |
| Easy to use and manage Can be used with all sizes of pots and utensils Provides warmth as well as heat for cooking | Bulky in size Not ideal for carrying around |
Charcoal Grill
It is pretty self-evident from the name what a charcoal grill is.
It is our standard everyday grill that is commonly used in weekend BBQs. More importantly, it uses charcoal as a source of fuel instead of firewood.
They are more often than not stationary with little mobility. Sure, you can move them around, but they’re not exactly what I’d call portable. They’re great if you know you’re not going to be moving around a lot.
Moreover, since they don’t use firewood as fuel, they are harder and take longer to ignite. They are also usually hard to clean up afterward.
If you are a traditionalist who loves nothing better than a BBQ, this is perfect for you.
| Pros | Cons |
| Dependable Sturdy Works well in windy and rainy climates | Bulky in size Difficult to get started Hard to clean |
Camping Oven
If you haven’t seen a camping oven before, you might imagine a huge box-shaped oven sitting in the middle of the wilderness.
Well, that’s not what a camping oven is. Also known as Dutch ovens, these things are pot-like appliances made entirely of cast iron. The traditional way to cook with a camping oven is to dig a hole in the ground, fill it with burning coals, then put your oven inside, and then cover it up with another layer of coal. Depending on what you are making, you can adjust the heat by adjusting the amount of coal. They are great heat conductors and are well suited for pretty much all kinds of camping and survival situations.
Another way to cook with these is to use a tripod, and a chain as the oven hangs over the heat source.
| Pros | Cons |
| Movable in bug out vehicles and vans Easy to use | Quite heavy Limited capacity |
Volcano Stove
A volcano stove or grill is a pretty handy appliance for your survival cooking needs. It gets its name from its shape and the way it’s designed. When it is expanded, it looks like a volcano.
The best thing about it is twofold. One, it can collapse and expand to allow for more or less space. Secondly, it can work with a variety of fuel options.
You can place a propane burner inside it, cook food with charcoal, or perhaps go with firewood. This makes it versatile and adaptable to different circumstances and happens to be one of the best survival cooking appliances, in my opinion.
| Pros | Cons |
| Work with multiple fuel types Adjustable according to requirements Portable | Heavy |
Solar Dehydrator
As the name suggests, it is not exactly a cooking appliance but a dehydrating appliance.
It is a simple yet effective piece of technology that does the dehydrating more efficiently. Sure dehydrating is pretty simple, and anyone can do it without any appliance, but using a solar dehydrator is effective because it speeds up the process while protecting the food from anything that might damage it.
Traditionally, It is an inclined apparatus that is placed facing the sunlight. The food is placed inside and then covered with a glass pane that comes with it. Glass helps make sunlight more intense while also protecting food from bugs and insects. There are other designs available in the market as well.
| Pros | Cons |
| Efficient and quick method for dehydrating Allows for more protection | Huge in size Not portable |
Canned Heat
Yes! You guessed it right. It is the heat that comes inside a can.
Also called gel fuel or chafing fuel, this kind of cooking apparatus is perfect if you’re always on the go and want the cooking and eating process quick and easy.
These are small palm-sized cans, and you can use them in a variety of ways. You can place them in a hole in the ground, under the skillet, between two bricks, and start cooking. The only downside of using them is their limited supply of fuel, and if you don’t happen to have a lot of these nifty gadgets with you, you’ll soon run out of them.
| Pros | Cons |
| Light and easy to carry Easy to use | Limited supply For limited people (1-2) |
Outdoor Pizza Oven
This is definitely not one of those cooking appliances that you can take around with you. But it still happens to be a quite effective and reliable cooking solution.
Naturally, you’ll be needing someone to make it for you as per your requirements and design considerations. It’s not something that can be constructed easily by everyone in a DIY manner. You’ll also require some space outside, such as a backyard, to have it made.
The major downside of this cooking solution is that it won’t be of much use if you’re on the road, which is usually the case in an expected SHTF situation.
| Pros | Cons |
| SpaciousCan cater to almost all types of cooking needs Reliable Long-lasting | Stationary Requires technical knowledge to make |
Conclusion
You can’t call yourself a reliable prepper if you are not well versed in different methods of survival cooking and don’t know which method suits which situation best.
With this list, you are all set for an educational experience to experiment with all these methods and train yourself for when things go south. I am pretty sure that by learning these methods, the chances of you and your loved ones going to bed hungry will drop to almost zero.


Hey Conrad,
Great article! DIY and preparedness most definitely go hand in hand. Might I suggest after explaining the DIY method of the different cooking options, that you then link to or credit the product at market for the people who would rather buy readymade instead of DIY. I think you are limiting the option of some of your readers by not doing so. My name is Kris Johnson, president of Titan Ready USA and as a DIYer myself I get where you are coming from. With that said I also talk with customers every day who express to me their desire to purchase the product instead of building themselves. It wouldn’t take away from what you are doing however would help those that aren’t as skilled with their hands as you are to prepare their families the way that works best for them. Get ahold of me and let’s have you do a review of our off-grid cooking and bulk water storage products and let’s do a giveaway for your readers.
Thanks,
Kris