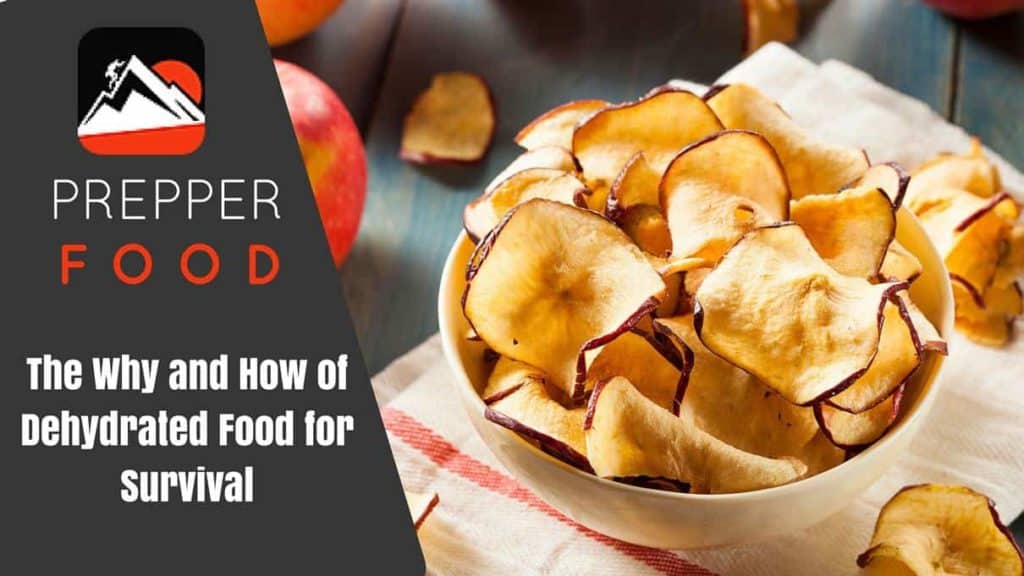
Victory gardening and hydroponics are great ways to obtain food, but what are you going to do if you have to bug out or something else disrupts your ability to produce food on demand? For centuries, people have used food preservation methods to make it from one harvest to the next. Even though there are many methods to preserve food, dehydrated food for survival has some key advantages. This article compares food dehydration to other common food preservation methods and then gives the basics of preserving fruits, vegetables, and meats.
Is Dehydrating Food the Best Method?
As much as I enjoy gardening and tending fruit trees, I am always mindful of the time and expense associated with
producing food. Over the years, I’ve been very disappointed when I was greeted with mold or other signs that food I’d preserved had gone bad. While I don’t believe any one method is the absolute best for preserving foods long term, I do admit that dehydrated food for survival has its place in my knowledge and equipment arsenal. Have a look at how food dehydration stacks up to some other common preservation methods:dehydrated food for survival has its place in my knowledge and equipment arsenal. Have a look at how food dehydration stacks up to some other common preservation methods:
- Freezing – even though frozen foods taste better and do not require rehydrating, they can only be stored in a freezer. If you lose electricity or no longer have alternative fuels on hand, you can try using salt and ice to keep foods frozen for a few extra days. Since dehydrated foods do not require freezing or refrigeration, they will remain in good condition as long as their storage area remains cool, dry, and dark. Finally, frozen foods usually last well under 1 year, while dehydrated foods can last 3 – 5 years.
- Canning and Pickling – Canned and dehydrated foods both have a disadvantage in the sense that low acid, low salt, low oxygen foods can easily harbor botulism. Unlike canning, however, dehydrated foods take up less space and are easier to transport. Even though dehydrated foods may not taste as good as canned foods, they will still be edible when you need them most. If you plan to can foods in the post-crisis world, you must also consider what kinds of fuel you will use, plus the cost of obtaining supplies. By contrast, you can dehydrate foods using heat from the sun in a dehydrator made from yard scraps. Considering canned foods also lose nutritional value after one year, it is best to dehydrate foods in terms of viable shelf life.
- Vacuum Packing – since vacuum packing also reduces the amount of oxygen in stored foods, they can also be a hidden source of the botulin toxin. I have also personally found that vacuum packing doesn’t last as long as other methods and that it is hard to get good quality bags that won’t break open or leak over time. By comparison, I do prefer dehydrating because the amount of wasted food is lower.
- Smoking – If you need to preserve meat for a few months, smoking will work, as long as you follow a recipe that works for the meat in question. Even though dehydrated meats last longer, there is no doubt that smoked meat tastes better. Remember that not all aspects of prepping need to be stringent and lacking in at least some small sense of luxury.
- Salting – When combined with smoking, salting meat can extend it’s shelf life to at least a year. Since salt also has a drying effect and serves as an anti-bacterial, it is also an important shelf life extender for just about every food preservation method.
- Fermenting – Aside from making wines and other alcoholic beverages that will last for years, fermenting is also very important for dairy products. Kefir and other soft dairy products can last several months under refrigeration while milk will only last a few days. In addition, other cheeses can last for months and years at room temperature and still be fit to eat. With the exception of wine, most fermented products will not last as long as dehydrated ones, however, fermented foods have a higher moisture content that makes them invaluable in situations where potable water is limited or not available.
You might also find interesting our article about emergency food storage.
Basic Tools and Supplies
Overall, you will find that there are relatively few tools and supplies required to make dehydrated food for survival needs. In many cases, you can either obtain the tools at low cost or make them yourself.

- Dehydrator – if you avoid commercial dehydrators and ovens, this can be one of the cheapest items to obtain. You can make your own dehydrator out of wood or many other materials. As a bonus, if you make your own dehydrator, you can choose a design that uses heat from the sun to dry foods.
- Tongs – since bacteria and other pathogens will always be on your hands, it is best to grab, turn, and put foods in storage containers using tongs.
- Disposable latex gloves and a scrubber (for washing your hands) – a good supply of latex gloves and a good quality hand scrubber add a second line of defense against germs that could cause dehydrated foods to go bad.
- Salt – this is one of the cheapest and most readily available food additives. Adding salt to dehydrated foods will not guarantee a longer shelf life, however, it can still be of help.
- Oxygen Absorbers – personally, I don’t recommend oxygen absorbers in dehydrated foods because of botulism concerns. That being said, if you want to reduce the risk of other bacteria growing, this is still a viable option.
- Other Preservatives – Rosemary and some other herbs can be used to help extend the life of meat and vegetables. Since many of these herbs also have medicinal value, they make a good dual-purpose addition to your food dehydration supplies.
How to Get Started With Dehydrating Fruits
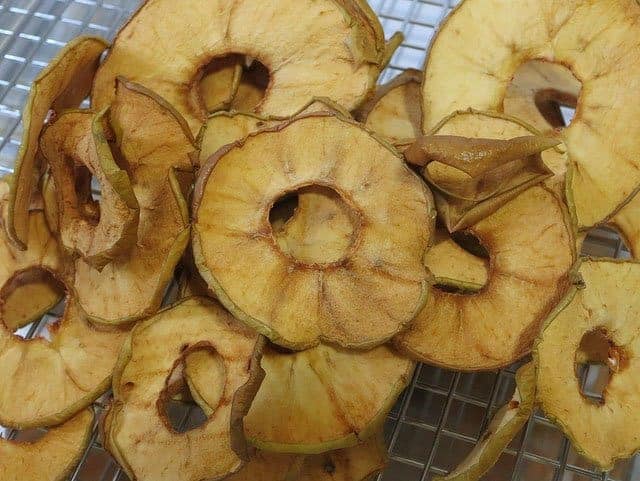
Apples, strawberries, citrus fruits, pears, grapes and other fruits will not last as long as dehydrated vegetables, however, they are still important for a well-balanced survival diet. Use the following guidelines for dehydrating fruits:
- start off by choosing fruits that are at their peak in ripeness without being rotted. Avoid fruits that have bug bites or other marks that indicate the skin of the fruit has been compromised. You can also dehydrate frozen fruits if no fresh ones are available.
- Make sure that the dehydrator temperature is between 125 and 135 degrees F. if you are using solar based dehydrator, make sure that the temperature will stay at that level for at least 10 – 12 hours (depending on the number of trays in the dehydrator and the kind of fruit.)
- wash your hands thoroughly. At this stage, latex gloves are optional.
- For fresh fruits, wash them carefully. If you purchased fruit at the store or purchased from a farm, be sure to wash off all waxes and pesticides. Unless you grew the fruit yourself and know you did not use pesticide, make sure that the fruit is washed thoroughly.
- Remove the core from fruits that have them such as pineapple, apples, and pears. Only core enough fruit for one tray in the dehydrator.
- If you are going to dry plums or peaches, remove the pits. This is also the time to remove skins from fruits that you want to dry without the skin. I recommend leaving most skins intact because this is where the most nutrition is. As long as the fruit is free of pesticide and wax, the skin is simply too valuable to waste.
- Most fruits will dry well if you cut them into slices between 1/8 and ¼ inch. Once again, only cut what you need to fill one tray.
- Once you cut fruit, it will begin to oxidize. Even though you can see this plainly in apples (which turn brown), other fruits have the same problem. To reduce oxidation and the decrease it causes in nutritional value, spray the fruit with lemon juice. If you cut only enough fruit for one tray at a time, you can stop oxidation faster and still have plenty of time to work.
- When loading the dehydrator, make sure that there is sufficient air flow around each piece of fruit, and also to the vent areas.
- After the fruits are dry, remove the trays from the dehydrator. Scrub your hands thoroughly and put on latex gloves. Try to use only clean and sterilized tongs to place the fruit in bags. Do not vacuum seal the bags. Let them stay open until the fruit is completely cool. If you seal the bags too quickly, moisture will build up again as the fruit cools. Depending on the fruit, it may take a day or two for it to condition.
- When fruits are cold, easy to bend or tear, they are ready to be placed in air proof containers. It should be noted that oranges and some other fruits may become extremely brittle and will crack easily.
We also recommend reading our article about how to preserve meat in the wild.
Some Dehydrated Fruit Recipes You Might Enjoy:
Here are some alternatives to simply drying slices of fruit and then using them alone or in other prepared foods.
Aside from making an excellent bug out foods, some of these recipes might be ideal for children, diabetics, the elderly, or others that cannot consume foods that are too brittle or tough.
- “Fruit Leather” - you may already be buying this in the store without realizing it. Why not make your own “fruit rolls” and add to your prepping skills at the same time.
- Apple Chips - this recipe is perfect for anyone that loves cinnamon and crunchy foods. You can also use different sugars, fruits and spices to come up with other chips and crisps.
- Candied Fruit – try this recipe to create dehydrated fruit with a higher sugar content. If you need a lot of carbohydrates or a calorie dense food, this is one way to do so.
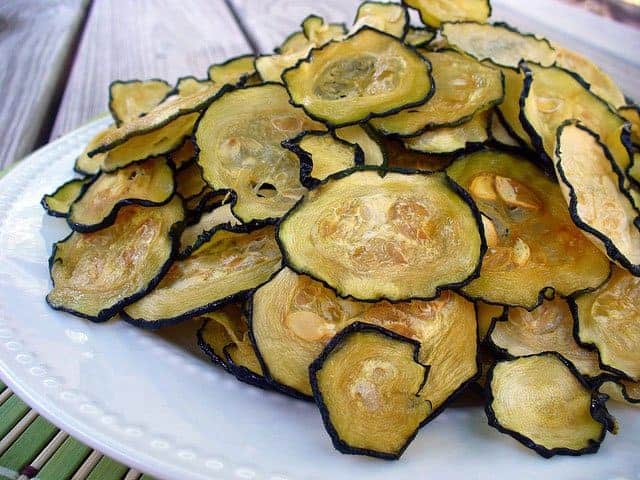
What You Need to Know About Dehydrating Vegetables
The process you will use to dehydrate vegetables is basically the same as you would use for dehydrating fruits. Use the guidelines above, but take note of the following differences:
- if you normally cook a vegetable before consuming it, then you should steam it for eight minutes before beginning the dehydration process. You can skip this step for cooked vegetables if you plan to use them in soups or other foods that will boil for several minutes. I recommend steaming these vegetables so there is no chance of mislabeling something or forgetting later on. At least if vegetables that need pre-cooking are steamed, you can still use them in boiled food recipes later on.
- Even though many vegetables can be dried together, avoid placing lima beans in the same bag.
- Unlike most fruits, vegetables will snap easily when they are properly dried. The exception is mushrooms, which will be leathery when fully dehydrated.
- If you are going to dehydrate mushrooms, it is best to dehydrate them alone because they require two different temperatures during the drying process. You should also avoid washing mushrooms before drying them. Instead, wipe them with a damp cloth to remove debris and dirt.
- You can also add flavor to cut mushrooms by stirring them in hot broth for a few minutes. Even though the mushrooms will take about an hour longer to dry, they will have a unique taste.
Dehydrated Vegetable Recipes to Try
When done correctly, dehydrated vegetables will be tender when fried or boiled. You can also use the following recipes to combine the dehydration process with pre-cooking for fast bug out meals and other needs:
- Cauliflower Popcorn – you can also use other spices and herbs to suit your personal tastes.
- Sweet Potato Chips – this basic recipe can also be used to make potato chips. Why put up with oil soaked chips when you can get perfectly seasoned potato chips from the dehydrator?
- Tomato Sauce Leather – as with fruits, some vegetables will also form a rollable, pliant “leather” when they are blended and dried in thin sheets.
- Starchy Food “Bark” - high starch food such as potatoes and pumpkins won’t make leather. Instead, they will become very brittle when you dry them. Once they come in contact with water, they will rehydrate quickly and retain most of their original flavor. You can combine all kinds of ingredients to make tasty barks that can serve as sauces, gravies, and other nutrient dense foods for survival needs.
Basics of Dehydrating Meats
According to Dave H, a reader of Survival Cache with experience dehydrating many kinds of foods:
“I have dehydrated chicken, turkey, ham and pork. The dehydration SHTF Food Storage process is simple and they seem to come out fine. I do get concerned that the remaining oils will turn rancid.”
Let me be clear in saying that I prefer salting and smoking meats because of taste and safety concerns. I’d rather have meat with a 1-year shelf life and make it a point to consume it in that time period than have it hanging around in a dehydrated food bag, or worse yet, avoided because the meat is too tough or hard to consume for another reason. That being said, here is the basic process for dehydrating meat:
- you can use meat purchased at the store or meat from an animal you hunted. Make sure the meat is ready for cooking. Follow the same hygiene tips for fruits and vegetables. If you are going to dehydrate different kinds of meat, do not forget to scrub your hands thoroughly between handling each type.
- Add rosemary to the meat while it is cooking since this herb will help stabilize any oils and fat remaining in the meat.
- After the meat cools, cut it into narrow, 1” strips that are no more than 1/16” thick. Don’t forget to scrub your hands. I don’t recommend putting different kinds of meat together in the dehydrator. In addition, I don’t recommend dehydrating meat together with fruits and/or vegetables because oils in the meat may still escape the drying meat and create a layer on fruits and vegetables. This, in turn, can make them go rancid quicker than expected.
- Most meats need to be dehydrated at 160 degrees F for 6 – 10 hours.
- Once the meat is dehydrated, allow it to cool thoroughly before sealing into bags.
- Don’t forget that dehydrated meat won’t last more than a week or two without refrigeration. If you want it to last longer, it will need to be frozen.
- As a word of caution, try to avoid adding meat to dehydrated fruit and vegetable recipes. Even though these items may taste delicious when rehydrated, the meat will shorten the shelf life of everything else in the bag. You are better off adding meat when you prepare meals for immediate consumption.
Dehydrated Meat Recipes for You to Enjoy
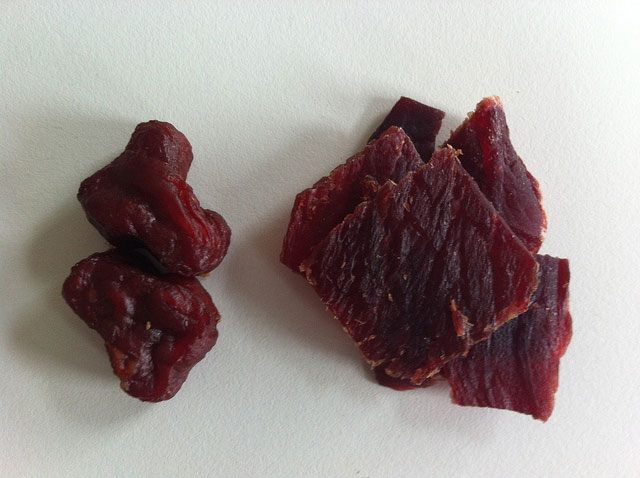
- Beef Jerky – you can also modify this recipe by using other meats and seasonings.
- Dehydrated Chopped Beef – this recipe can also be modified to make bacon bits or other meat-based seasoning combinations from chopped turkey, chicken, and deer meat.
- Fish jerky – use for just about any kind of fish and seasoning combination. Just remember that some fish have a lot of oil in them, so you may need to take some extra steps to remove it.
Have you been preparing dehydrated foods for long term survival? Please comment in the section below about your experiences, tips, and advice. Have you used the recipes listed in this article or others? If so, I’d love to hear more. Food is such an important part of survival, and I believe strongly in finding ways to prepare safe, tasty meals for disasters right along with routine needs.
Additional Resources:
- Best Dehydrator Recipes
- Dehydrating Veggies Headquarters
- How to Dehydrate Vegetables
- 7 Super Hydrating Foods – Infographic
- Quick Tips for Dehydrating Food
- How to Make Deer Jerky That Will Make You Drool in Only 7 Simple Steps
- Proven Methods for Dehydrating Apples Every Gardener Should Know