Contents
No one likes to imagine the worst when they go on a hiking trip but things can get bad without warning. The outdoors are unpredictable – so is life. You don’t have to watch an amazing season of 24 to know that.
It can be sunny in the morning and start to rain and storm by evening. And your worst enemy in such an unpredictable circumstance? The lack of preparation.
When you’re heading outdoors, whether for a few hours or for a few days, you must be prepared for any kind of situation. And preparation doesn’t just mean being aware of what can befall you in the wilderness; you must also have a few essential supplies on hand to build yourself a shelter.
No matter how great the weather, you must never disregard the value of being prepared whenever you head into the wilderness.
You may survive a long time without eating, but if the weather turns bad and you have no shelter, things can get really bad.
Therefore, knowing how to make a survival shelter in the wilderness is one of the greatest skills that you can have in the outdoors. Keep reading to be completely prepared for your next adventure in the wilderness.
You might also find interesting our article about building a bunker.
Things to consider before building a survival shelter
Before we begin it must be remembered that this guide is not meant for the times when you are stranded in the wilderness with a raging storm.
It is meant for those times when you are planning a trip outdoors so you can be prepared for anything before you head out. And one of the first things to do when building a survival shelter is to consider your location, your surroundings and the supplies you have.
Regardless of where in the wilderness you are stranded, the type of survival shelters should be chosen according to the location. No matter how urgently you are in need of shelter, you should evaluate your surroundings and your requirements before starting to build a shelter.
First and foremost, you must choose the right place for building your shelter. That means the ground should not be too rough, it should not be sloping, on the shelter should be able to hold on. Do not build your shelter on top of a hill or any sloping surface.
At the same time do not build a shelter too close to a water body, like a stream or lake, because if there is heavy rain the water is going to flood and affect your shelter.
You should also be careful to not build a shelter at the bottom of a hill because the water will run all the way down and flood the valley.
Instead of waiting for the weather to turn bad when you reach your location, the first thing you must do speak out a place for building a survival shelter if needed. If you are prepared in advance, you will not have to scurry around looking for a location to build a survival shelter if the weather indeed turns bad.
Once you have chosen the location for putting up your survival shelter, the next thing you must do is consider your other requirements including:
Are you alone or in a group? Obviously, if you’re alone you can get away with a small shelter but if you have a group with you to shelter needs to be big enough to accommodate everyone.
Otherwise, you have to build separate shelters for accommodating everyone in the group, which is pretty inconvenient and time-consuming when you’re stranded in the wilderness.
Are supplies available? If you have been prepared in advance and remembered to take shelter-building supplies with you, then you can manage to put up a shelter more easily.
But if you have no materials available to you at the moment you have to make do with anything let Mother Nature supplies you with. After all, desperate times call for desperate measures.
What’s the weather like? If you want to be protected from the sun in a desert, you have to build an appropriate shelter. But if it’s raining or storming, then a shelter boots to protect you from the sun will not be enough.
Therefore, taking the current weather into consideration is highly important when building a survival shelter in the outdoors.
Are you in the woods? If you are in a forest region, there are plenty of materials like twigs, branches, and leaves that can help you put together a shelter.
But there is also the risk of wild animals and poisonous insects in the woods, so the shelter must be able to protect you from these dangers. Just watch that fantastic movie Sister’s Brothers to know that!
Keep that fire going.
Is there snow on the ground? If there’s snow on the ground, you may have to carve a shelter out of the snow. That’s right, in a snowstorm, no other type of shelter will hold up, so you need to hollow out a big pile of snow and insulate the inside for protecting yourself against the elements.
Are you in a desert region? In a dry, arid region, the main purpose of a shelter is to offer sun protection. Look around you for dry shrubs that you can use to create shade from the sun.
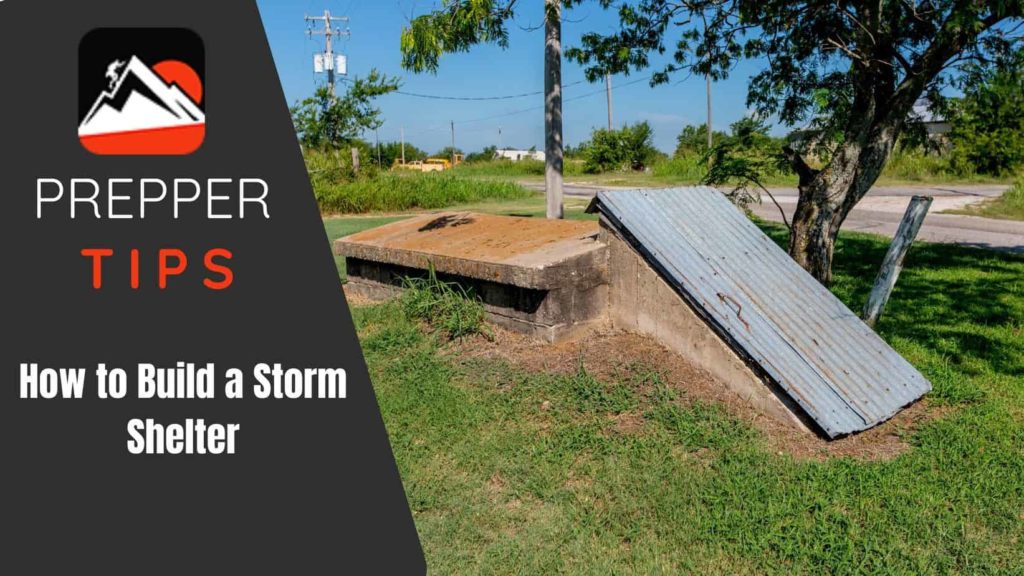
We also recommend reading our article about building a storm shelter.
Picking the right shelter design
The type of survival shelter you choose to build will depend upon the current weather conditions as well as your location and the materials you have available.
Of course, you are not expected to build a snow cave in a desert or a tent when there is snow all around. There are more than 20 types of shelter designs that you can choose but ultimately it comes down to the materials you can get and the weather conditions.
Some of the most common shelter types based on weather conditions are tree shelters, snow caves, desert shelters, and tarp shelters. Each of these designs can be modified to suit current conditions.
Insulating the shelter
In a survival situation staying warm and dry are two most crucial factors. Whether it’s raining, snowing or storming, you should try your best to remain dry, because when you’re dry it’s easier to stay warm.
You can use dry leaves to create warmth, but you should first try to build a small cozy shelter that remains warm. You can also use hay or grass to create warmth. Also, make sure to layer on clothing and blankets to remain warm inside the shelter.
Avoid laying directly on the ground because that will make you lose body heat rapidly. You should insulate the surface you plan to lay on using branches and pieces of wood. If you have nothing to create a bed out of, simply use branches, dry leaves, grass to trap warm air, and prevent heat from escaping.
If the weather permits you can also build a fire outside the shelter. Avoid lighting a fire inside the shelter because it can burn down the leaves and branches.
Ventilation considerations
No shelter is habitable without ventilation. If you cover up all sides of the shelter and have no ventilation, you are basically building a death trap. Regardless of the weather, make sure to have holes in strategic places to ventilate the shelter.
Survival shelters with a tarp
Tarpaulin, the strong, durable, water-resistant material, can be your best friend when building an emergency shelter. When going for an adventure outdoors make sure to have a couple of tarp sheets in your backpack because it can be a real savior emergency situation.
If you have tarp sheets, you can make a large number of survival shelters, only using a few branches and rocks. To protect you from the sun, the snow, and the rain, and also traps heat to keep you warm.
The following are the different kinds of survival shelters you can build if you have tarp sheets with you:
1. A-frame shelter
This is one of the easiest survival shelters to make if you have tarp sheets. All you need are some straight branches, a few rocks, and tarp.
An A-frame shelter is easy and quick to build and can also be customized to the number of occupants. The shelter gets its name from its shape.
The frame looks like inverted Vs, which look like As. First, you have to find four straight branches and tie them to make two inverted V’s. you can tie the branches together with rope or if you do not have any other material you can use your shoelaces to tie them together.
Next, you have to find two long straight branches and use them as rails along the sides of the two inverted Vs. This will be your sleeping platform. Cover the frame with grass or dry leaves, but if you have a tarp, it makes the best shelter.
Pros
• Moderately easy to make
• Quite sturdy against wind
• Two sides protection
• Moderate heat retention
Cons
• Inadequate for extreme weather conditions
• Takes time to build
• Requires a lot of supplies
2. Lean-to shelter
This is another easy and quick shelter to build using some branches, rope, and tarp. This is a single pitched shelter with only three walls capable of providing protection from rain and sun.
Unlike most other forms of emergency shelters, a lean-to shelter has a roof resting on support that extends to the ground, giving it the appearance of a leaning roof.
You first have to build a square frame and then build the roof with branches and twines. Once the roof is resting on the ground securely you can use the tarp to cover the frame and provide more protection.
Pros
• Quick and easy to set up
• Requires few materials
• Offers decent cover against sun and wind
• Can be used as a heat reflector
Cons
• Not efficient against heavy rain
• Waterproofing only on one side
• Not great to trap body heat
3. Bivy bag cornet shelter
A bivy bag cornet shelter is great for those times when you’re trying to deflect wind and rain. Besides offering excellent protection from the elements, the bivy bag cornet shelter is also easy to erect, and you should be able to master it with practice.
The most important material for the construction of this shelter is a point or a tree to tie the line to.
You will need rope or guy line to be able to build this shelter. First, you have to tie the rope to a tree a few feet away and at the other end hammer in a stake to the ground.
While doing this, make sure the low end faces the direction of the wind for maximum protection. Next, you need some tarp or canvas to throw over the rope diagonally, while stretching out the corners and hammering in stakes on each side.
The floor of the shelter should meet with one side while the stakes go through the floor and the side of the shelter. Although this sounds complicated, with practice, it isn’t a difficult shelter to put up in emergency situations.
Pros
• Good for deflecting wind and rain
• Requires only tarp or canvas and an anchor point
Cons
• Not much room inside
Tree branch survival shelters
If you have no other materials available except tree branches and some ropes, you can still build habitable shelters in emergency situations.
In the wilderness finding branches, it’s not a difficult task, unless the ground is covered in snow and building a traditional shelter is not possible. The following are two of the most popular tree branch shelters that can be put up quickly and easily.
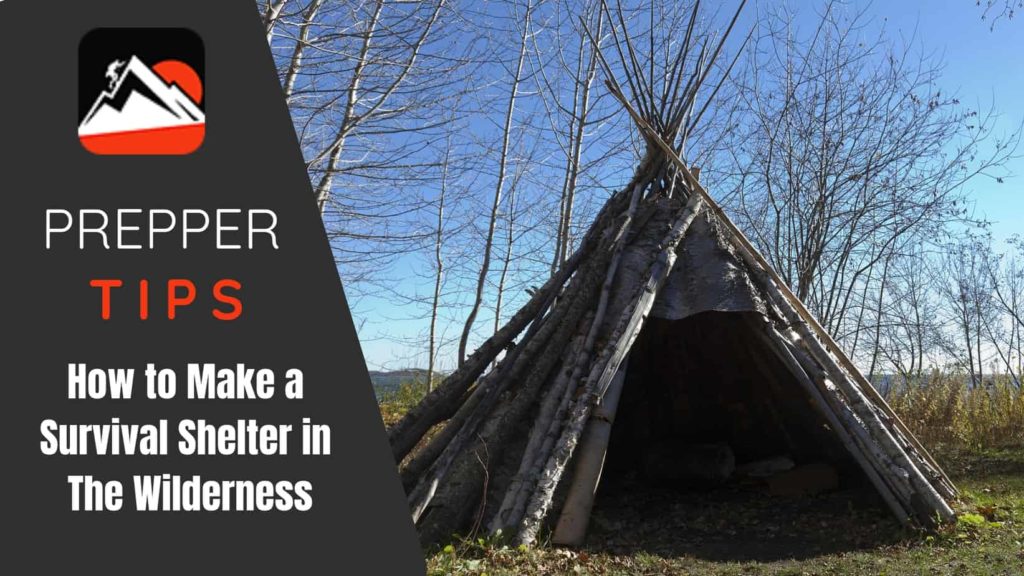
1. Teepee
A teepee is a military-style shelter, using only tree branches and a cover material like canvas or tarpaulin. All you have to do is gather some long tree branches and arrange them in a design similar to a tent.
Then you have to wrap your tarp or canvas around these poles to cover the frame. The ends of the branches can either be dug into the ground or held securely in place with rocks and stones. A teepee is great for a large group and also provides enough room to have a fire inside.
Pros
• Best for large groups
• Decent protection from elements
• Easy to build and sturdy
• Good for cold weather conditions
Cons
• Requires practice
• Requires large sheet of tarp or canvas
• The hole at the top lets in rain
2. Debris Hut
A hut made out of readily available debris is what this shelter is all about. When you’re building this type of a survival shelter, all you need is plenty of debris- from branches to dead leaves to dry grass soil to mud.
Yes, if you never knew that a heap of debris could help you build a shelter, you will be surprised by this one.
Using a long branch or tree, create an anchor point, and then use a few long branches to make an inverted V-shaped frame. Next, pile up the debris from the ground to make a mound around the frame.
That’s it- your shelter is ready. You have to build this shelter in a location where there is already a lot of debris on the ground. You can do this in any weather condition, but in heavy rain, the debris might get washed away.
Pros
• Quick and easy to make
• Provides room and warmth
• Good for hiding
Cons
• Needs to be built where there’s a lot of debris
• Might be washed away in heavy rain or storm
Snow survival shelters
When there’s a snowstorm and the ground is covered in frost and ice, you need to use the snow all around to make a shelter. That’s right, you have to turn into an Eskimo and build a house out of snow. The following are three ways to do this:
1. Snow Cave
Typically, a snow cave is built by animals to hibernate in winter. But humans also make them in emergency situations. All you have to do is pile up the snow to make a mound and then carve out a cave inside.
Make sure the snow is firm enough or it can trap and kill you. You also need to create holes in the snow for ventilation. Insulation can be provided by a small light source like a tea candle or a battery-operated lamp.
When properly built, a snow cave maintains a temperature of 35 to 40 degrees, regardless of the weather condition outside. However, it takes a lot of practice and a lot of precautions.
Pros
• Requires no supplies other than snow
• Can be built quickly with practice
• Can be as small or as big as required
Cons
• Not safe enough
• Can collapse
• Proper ventilation required
• Insulation required
2. Tree Pit
If you have never considered taking shelter under a tree, this is the time. The area underneath the branches of a big (evergreen) tree can almost always be free from snow, because of the cover offered by the branches and the leaves.
The pit of the tree can be used as a temporary shelter, simply by crawling underneath and removing snow from the floor of the pit.
The bare ground gives out quite a bit of heat, so moving away the snow will keep you a little warmer. Make sure to put a cloth or a foam pad on the ground for a little more insulation.
Pros
• Quick and easy
• Takes barely any materials, aside from a shovel
Cons
• Not a safe hideout
• Tree branches may not be enough protection from snow
• Branches or leaves may fall while you lay on the ground
3. Quinzhee
This is very similar to a snow cave, but only a Canadian version. You hollow out a big pile of snow and then make a room inside.
Basically, snow caves and quinzhees are from the US and Canada respectively, but the advantages and disadvantages remain the same. It takes a lot of practice to build the perfect snow cave or quinzhee so it may not be ideal for everyone caught in a snowstorm.
Pros
• Requires hardly any material, aside from a shovel and a sleeping bag
• Offers decent cover in a snowy location
• Can be made as big or small as required
Cons
• Takes time and effort
• Not the warmest or safest
• Improperly built quinzhees may collapse and kill
Desert shelters
When you’re in a hot, arid region like a desert, you need sun protection more than anything else. We’ve been talking about heat so long, but now we’ll talk about keeping the shelter cool and protected against the heat of the sun.
Desert conditions offer no mercy; with the sun beating down almost the entire day, without proper protection you will be a fried chicken in no time.
Desert shelters are built much like any other shelter, but they should be able to shield the sun and keep cool. That’s the primary feature of a desert shelter. The following are the two most popular types of desert shelters.
1. Dugout shelter
As the name suggests, this type of shelter requires a lot of digging in a sandy part of the desert. You have to use plenty of water to wet the sand and carve a cave out of it so you can go underneath.
In a desert, sand is the most easily available material, so use all you want to create a cave and get protection from the sun. Beware of floods, though. If you fail to choose a proper location, you dugout can turn into a wash basin.
Pros
• Provides sun protection
• Requires only sand and water
• Provides long-term shelter
Cons
• Not safe against water
• Proper location is required
2. Juniper tree shelter
In a wooded area, it’s easy to spot fallen juniper trees. The shape of a fallen juniper tree is such that it can be easily used to create a survival shelter.
You have to create a bed with dry leaves, create insulation by starting a fire, and use the leaves of the tree as a shield from the sun or rain. However, this is only a short-term shelter and cannot be used long term.
Pros
• Requires no materials
• Easy and quick
• Provides decent protection from rain or sun
Cons
• Fallen juniper trees may not always be available
• Not a long-term option
Final thoughts
Survival shelters are of various kinds, but it all depends upon the weather conditions and the materials available and your own skills. The best option is to take the time and practice in advance to master building a survival shelter in the wilderness.


