Contents
To be the best prepper, you have to build things. Even though you can buy some things pre-made, they may be more expensive. They may also not fully meet your needs.
Right now you may have a lot of time on your hands. Here are 7 things you can build alone or with family members. Each of these items can be of use now, or for future crises.
Bucket Washer and Wringer
With COVID-19, we still have electricity. If you have a washing machine, you can still use it. Sadly, if you go to the laundromat, it may not be safe.
A bucket washer is easy and cheap to make. You can also use it if you lose power during some other emergency. Here are some other advantages:
• your clothes will come out cleaner. Washing machines leave a lot of soap and dirt behind. With a bucket washer, you are always in control and can do extra rinses.
• You will use much less soap. A 5-gallon bucket only takes about a teaspoon of soap.
• Never ruins fragile clothes.
Basic Methods
To make a bucket washer, all you need is a 5-gallon pail and something to move the water and clothes. You can buy an agitator, but be careful about ones with plastic handles. I have used the breathing mobile washer for years. It works much better than a washboard and uses less water.
You can also make an agitator from a plunger. Just make sure it is very sturdy. Use a power drill to put holes in the plunger. This will allow water to move through the plunger.
Pre-made wringers are very expensive. They can also be dangerous to operate. You can make a wringer from a second pail. Just drill holes in it to let the water out.
When you do laundry, put the wringer bucket in the wash bucket. Once you are ready to wring the clothes, just remove the inner bucket. Use a clean bucket bottom to push down on the clothes. Water will flow out through the holes.
Problems You May Encounter
Most sites tell you to drill a hole in a lid for the wash bucket. I found it is much easier to not use a lid at all. Just do your laundry outside or in a tub so water splashes don’t get on the floor.
Tools and Materials
- Power Drill
- Plunger or pre-made agitator
- (3) 5 Gallon Buckets
[embedyt] https://www.youtube.com/watch?v=3jNv6mUmyIY[/embedyt]
You might also find interesting our article about DIY hobo stoves.
Hand Sanitizer
People that are not preppers buy at the last minute. Right now, they are buying hand sanitizer. Many products won’t even work on COVID-19. The EPA has a site that tells you what will work. It also tells you how long the surface has to be wet. Even if people get the right chemical, they may not be leaving it in place long enough. If you decide to make a hand sanitizer, make sure you know how to use it.
Basic Methods
Most sites will tell you to mix rubbing alcohol (use at least 91%), and glycerin to make hand sanitizer. It looks like the WHO recipe uses Hydrogen Peroxide (3%) as well. All 3 items are very hard to get right now. Some sites will tell you to use aloe instead of glycerin. Unless you have many aloe plants, you will not have enough gel to make a lot of sanitizers. Make glycerin from animal and plant-based fats. To do so, you will also need lye and salt.
Instead of using rubbing alcohol, you can use edible alcohol as long as it is 140 proof (70%) or more. If you cannot get alcohol this strong, make a still.
Depending on the strength of the alcohol, all you need to do is add 1 part glycerin to 2 or more parts of alcohol. The alcohol must be at least 60% strength to kill COVID-19.
Problems You May Encounter
Lye is dangerous to work with. Making a still and using it can also be dangerous. Some states may not allow you to have a still. It is very hard to get Hydrogen Peroxide right now. Making it is dangerous in a home setting. You may need to leave it out of the mix.
Tools and Materials
- glycerin
- vegetable oil, aloe, or other fat to make glycerin
- lye
- salt
- rubbing alcohol
- yeast to make edible alcohol
- sugar
- still
- hydrogen peroxide
[embedyt] https://www.youtube.com/watch?v=3TxjTDYOFg0[/embedyt]
Face Masks
The WHO misled all of us about masks. They said masks would not slow the spread of COVID-19. Now the CDC is saying to wear a mask in public. A cloth mask can sort of stop liquids, but it will not stop a virus. Even surgical masks and N95 masks are not 100%. It depends on how the mask is made, and how it is worn.
If you combine a cloth mask with a surgical mask, you will have a better chance of avoiding COVID-19. To do so, the cloth mask has to be made right. Then, you will have to buy disposable inserts to go in the mask. You can use surgical mask material or inserts used for toxic chemicals.
Check out: Best Materials for Filtering Viruses in Masks
Basic Methods
Most sites will tell you to fold material several times and sew it. Choose a pattern that lets you add a pocket. You can also make a mask without sewing. Some sites say a nose clip is optional. If you don’t have one, the mask will fall down. It also won’t stay as close to your face as it should. You can use a paper clip to make the nose clip.
Problems You May Encounter
To make a mask, you will have several fabric layers. The inner layers may not dry right. You won’t know because the outer layer is dry. It is best to make a mask you can unfold so that you can wash it as a single layer. After you make the mask, you will have to keep it clean. Do not put the mask back on without sterilizing it. You can use boiling water if you don’t have bleach or other sanitizers. You will need to make several masks so that you have enough for your needs.
Tools and Materials
- 100% pre-shrunk cotton.
- paper clip or other material to make a nose clip.
- Thin material for ear loops. You can also use rubber bands.
[embedyt] https://www.youtube.com/watch?v=CRBJ4JSVYpo[/embedyt]
We also recommend reading our article about DIY prepper projects you can do at home.
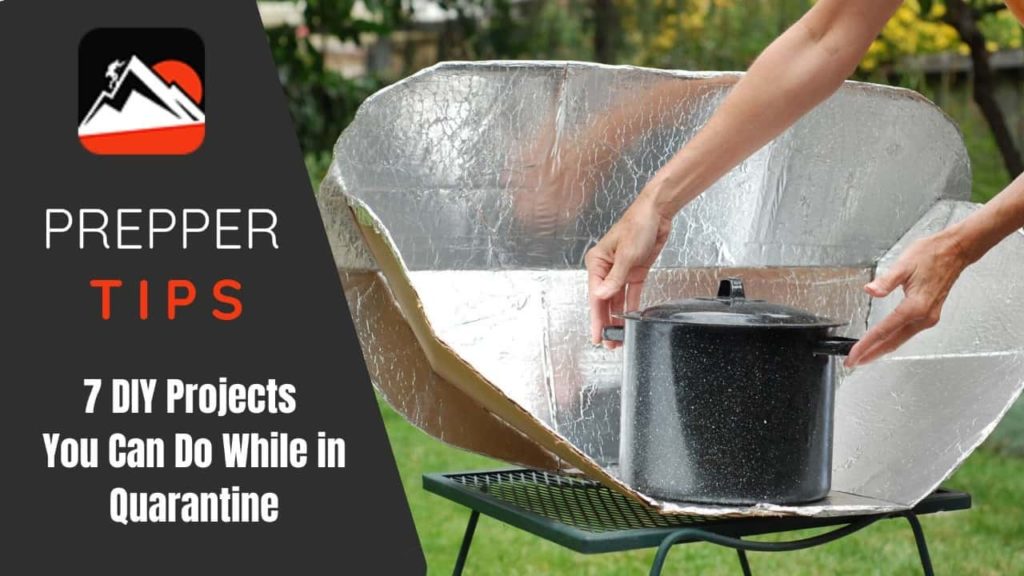
Solar Cooker
Money to pay utility bills is getting hard to find. At some point, you may not be able to cook food in your kitchen. A solar cooker will help.
Basic Methods
There are so many ways to make a solar cooker. You can make a very cheap and easy one from cardboard and tin foil. If you want a solar cooker that will last a long time, you can use wood. Solarcooking.org has many good plans. You may also want to build some other cookers that use the sun. This includes:
• a solar oven – This is a bigger box than a cooker.
• Solar dehydrator – If you can’t keep meat cold, then you can dehydrate it in this device. Same deal with fruits and vegetables.
When you make a solar cooker, it may not be possible to use regular cooking vessels. First, you will have to paint them all dull black so they absorb as much heat as possible.
Some cookware does not work well at all in solar ovens. Mason jars painted black work very well.
Problems You May Encounter
A basic solar cooker is very easy to make. Using it is another story. Here are a few things you need to consider:
• the solar cooker will go around 250 to 350 degrees F. A lot depends on the way you build it. Sun intensity also makes a big difference.
• Solar cookers make a lot of reflection. The sun also shifts all the time. If the reflection lands on an item that burns easily, it can start a fire. You have to watch the solar cooker all the time.
• A cardboard solar cooker can also get too hot and start a fire. So can devices made from other materials. You have to be very careful about where you set up and use the cooker.
• On rainy or cloudy days, the solar cooker will not work well. It can take hours to make a meal.
Tools and Materials
- It depends on the model you are building.
- Use mason jars for cookware.
- Oven bags help insulate the cooking vessel.
[embedyt] https://www.youtube.com/watch?v=O2UUMaqlors[/embedyt]
Bucket Planter
Right now, food is left to rot because no one can pick it. Milk is being dumped also. Meat farms are closing because workers are sick. The news says food is not scarce. But there are problems in getting food to people. We do not know what the weather will do. Floods, bugs, and more could cause crops to fail.
All of this points to food shortages. Now is the time to start a garden that you can control fully. That means you have to be able to grow plants in your home. Bucket planters can be used for many foods. You can grow potatoes, zucchini, beans, corn, sugar beets, quinoa, and sunflower. Using buckets is important because you can move the plants with ease. Let’s say you decide to put the buckets outside. If bad weather comes, you can bring them in. Where a farmer would lose the crop, your food will be safe.
Basic Methods
Bucket plants are really easy to make. All you need to do is drill some holes in the bottom of a 5-gallon pail. Next, put some gravel or loose rock at the bottom of the bucket. This will help with drainage. It is up to you to choose the soil. You can easily customize blends for plants that like acidic soil. Or, you can use as many fertilizers as you want.
Problems You May Encounter
Growing fruits and vegetables in the house can be hard. You have to choose plants that will do well in low light. Or, you will have to buy grow lights. If you lose power, these bulbs will not work.
Using the right amount of water is also hard. A bucket does not always allow for good drainage. At the same time, plants need a lot of water to grow. It is very easy to wind up with root rot. The balance between root health and growing needs is different for each plant type.
If you put too many plants in a bucket, they will not have good airflow. This will cause infections. It can also lead to more bugs attacking the plants. You will also have to space each bucket out so it does not impede airflow to others.
Tools and Materials
- Buckets.
- Gravel.
- seeds.
- soil.
- water.
- power drill.
[embedyt] https://www.youtube.com/watch?v=N-dXXY79mAA[/embedyt]
Water Capture System
A lot of people say our water supply is safe. Even if workers get COVID-19, it takes very few to run the water system. I disagree because people may not be able to pay their water bills. When people don’t pay, then the water company can’t buy what it needs to clean the water. It also may not be able to buy equipment that breaks. Or, people that can repair the equipment may be sick.
These are just a few ways that COVID-19 can cripple our water supply. Even if these things don’t happen, natural disasters or other things can cause problems. Having a water capture system ready is the best way to make sure you have water all the time.
Also read: Coronavirus-driven CO2 shortage threatens US food and water supply, officials say
Basic Methods
There are many ways to capture water. First, you can focus on rainwater. As with solar cookers, you can start with a bucket. Make a tarp funnel and you will capture more water. There are many ways to capture rainwater. Next, you can try to gather water using a solar still. Just dig a pit and put a cup in the center. Add leaves and grass to the pit to pull water from them. Make sure the plants are not in the cup.
Put a tarp over the pit, and then a stone on the tarp above the cup. This will cause water drops to fall into the cup. There are also several ways to pull water from the air. The easiest way will involve the use of salt and fans.
Problems You May Encounter
After you capture the water, you have to keep it clean. Fungus, mold, and bacteria will all build up in water that doesn’t move. Mosquitoes and other bugs may also nest in the water. These can all be dangerous to your health. If you plan to store the water, you will also have to make sure it moves. This will require a pump in the tank.
You will also have to deal with other water quality problems. Rainwater in some areas is very dirty. It takes activated carbon and other media to clean the water.
Many towns and cities do not allow you to capture water. Even if you can do it safely, they will say it is against the law. If you find this is true in your area, then you have to recall leaders that support this. You must also vote for leaders that will change those laws.
Tools and Materials
Depends on the system and focus. Some common materials include:
• plastic or tarp
• buckets
• water pump
• fish pump and air tubing
• salt
• fans
[embedyt] https://www.youtube.com/watch?v=MYTNciCplmw[/embedyt]
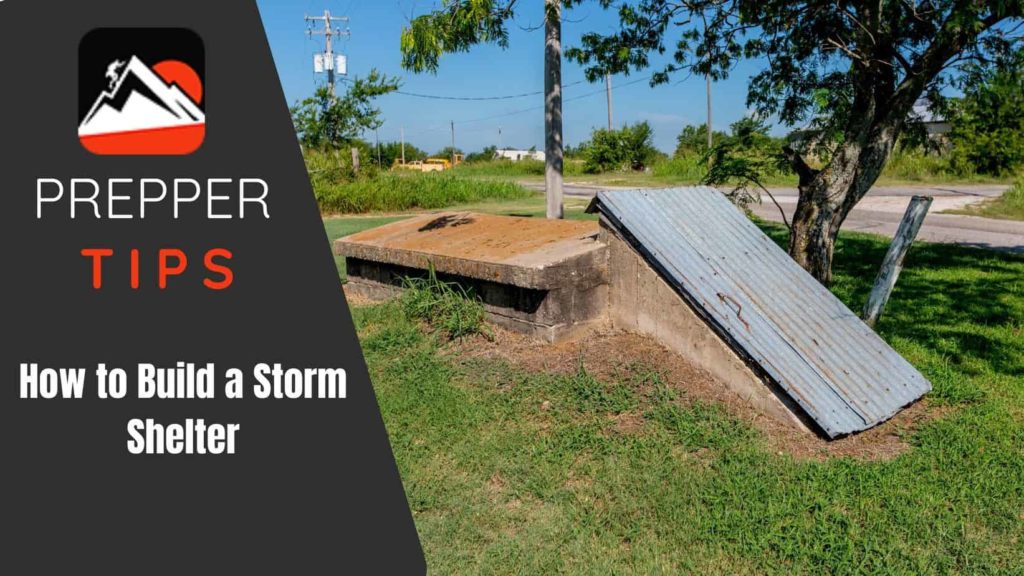
Root Cellar
A loss of power means food will go bad. If you don’t have a basement, you may not have a safe place during a tornado. These are two things a root cellar is good for.
Basic Methods
There are many ways to build a root cellar. They all must have good airflow and must stay cold. It is up to you to decide how big the cellar will be. If you have enough room, you may want to build several in your yard.
Problems You May Encounter
First, you may need to get a permit to build a root cellar. This can be expensive and take time. Once you know you can legally build the root cellar, you will have to buy materials. Some stores are taking a long time to ship. Others are expensive. Here are some problems you may find when using the cellar:
• moisture level below 80%. Foods may dry out or go bad faster.
• Moisture level above 95%. Mold and fungus may build up. Foods may also rot. Metals will rust.
• Snakes and bugs may want to use it for their home. You will need to use mothballs to keep these creatures away.
Tools and Materials
- power saw
- hand saw
- power drill
- hammer
- nails, screws, and other fasteners.
- cinder blocks – many people prefer these because they are sturdy and cheap. Your other option is to use concrete.
- Mortar – for joining cinder blocks.
- Wood – you will need to make a wood form as support. Most people also use wood for the main door.
- Pipe – you will need vent shafts to keep a lot of air moving. Some vents will move cold air in. Other vents will move warm air out.
Shelf Material – it is up to you to decide what you want to use for shelves. You can use wood or plastic. In general, plastic is cheaper and will last longer. Even if you seal the wood, it will rot sooner or later.
[embedyt] https://www.youtube.com/watch?v=0aocW4oJEVg[/embedyt]
Conclusion
These are just a few DIY things every prepper should know how to build. One day you will be able to go back out into public places and not worry about COVID-19. Until then, you can use your time to good advantage. Right now you can build things that will make it easier to manage COVID-19. Many of these things will also help with other disasters.
You can store these things away and not use them for years. The day you need them is the day you will be glad you used this time to work on them. I am always interested in prepper DIY ideas. Please feel free to write in the comments about the things you have built.

